
-
 Afrikaans
 -
 Albanian
 -
 Amharic
 -
 Arabic
 -
 Armenian
 -
 Azerbaijani
 -
 Basque
 -
 Belarusian
 -
 Bengali
 -
 Bosnian
 -
 Bulgarian
 -
 Catalan
 -
 Cebuano
 -
 Corsican
 -
 Croatian
 -
 Czech
Czech -
 Danish
 -
 Dutch
Dutch -
 English
 -
 Esperanto
 -
 Estonian
 -
 Finnish
 -
 French
 -
 Frisian
 -
 Galician
 -
 Georgian
 -
 German
 -
 Greek
Greek -
 Gujarati
 -
 Haitian Creole
 -
 hausa
hausa -
 hawaiian
 -
 Hebrew
 -
 Hindi
Hindi -
 Miao
Miao -
 Hungarian
 -
 Icelandic
 -
 igbo
igbo -
 Indonesian
 -
 irish
irish -
 Italian
 -
 Japanese
 -
 Javanese
 -
 Kannada
 -
 kazakh
 -
 Khmer
Khmer -
 Rwandese
 -
 Korean
 -
 Kurdish
 -
 Kyrgyz
 -
 Lao
Lao -
 Latin
Latin -
 Latvian
 -
 Lithuanian
 -
 Luxembourgish
 -
 Macedonian
 -
 Malgashi
 -
 Malay
Malay -
 Malayalam
 -
 Maltese
 -
 Maori
Maori -
 Marathi
 -
 Mongolian
 -
 Myanmar
 -
 Nepali
 -
 Norwegian
 -
 Norwegian
 -
 Occitan
 -
 Pashto
 -
 Persian
 -
 Polish
 -
 Portuguese
 -
 Punjabi
 -
 Romanian
 -
 Russian
 -
 Samoan
 -
 Scottish Gaelic
 -
 Serbian
 -
 Sesotho
 -
 Shona
Shona -
 Sindhi
 -
 Sinhala
 -
 Slovak
 -
 Slovenian
 -
 Somali
 -
 Spanish
 -
 Sundanese
 -
 Swahili
 -
 Swedish
 -
 Tagalog
 -
 Tajik
Tajik -
 Tamil
Tamil -
 Tatar
Tatar -
 Telugu
 -
 Thai
Thai -
 Turkish
 -
 Turkmen
 -
 Ukrainian
 -
 Urdu
Urdu -
 Uighur
 -
 Uzbek
Uzbek -
 Vietnamese
 -
 Welsh
Welsh -
 Bantu
Bantu -
 Yiddish
 -
 Yoruba
 -
 Zulu
Zulu


changing lower control arm
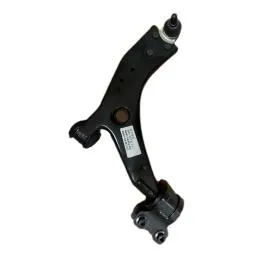
Changing the Lower Control Arm Insights and Considerations
The lower control arm is a crucial component of a vehicle’s suspension system, playing a vital role in maintaining stability, handling, and overall ride quality. Over time, it may become necessary to change the lower control arm due to wear and tear, damage, or performance upgrades. Understanding the implications and processes involved in changing the lower control arm can help vehicle owners make informed decisions and maintain optimal vehicle performance.
Importance of the Lower Control Arm
The lower control arm connects the wheel hub and the vehicle’s chassis, allowing for vertical movement of the wheels while maintaining the proper alignment. It is essential for absorbing shocks from the road, controlling tire movement, and impacting steering response. A well-functioning lower control arm contributes to better handling and ride comfort, while a worn or damaged arm can result in poor alignment, uneven tire wear, and compromised vehicle safety.
Signs of a Failing Lower Control Arm
Several indicators suggest that the lower control arm may need replacement. Common signs include unusual tire wear patterns, excessive vibration during driving, clunking or knocking noises when going over bumps, and a noticeable decrease in handling precision. If these symptoms are present, it is advisable to have the vehicle inspected by a qualified mechanic. Early detection of issues can prevent further damage to other suspension components and improve overall safety.
The Replacement Process
Changing the lower control arm is a complex process that typically requires specialized tools and mechanical knowledge. Here’s a general overview of the steps involved
changing lower control arm
2. Removing the Wheel The first step is to remove the wheel associated with the affected control arm to gain access to the suspension components.
3. Disconnecting Components To replace the lower control arm, various components must be disconnected. This includes detaching the ball joint from the wheel hub, removing any associated bolts, and disengaging any sway bar links.
4. Removing the Old Control Arm Once everything is detached, the old control arm can be unscrewed and removed from the vehicle. It’s essential to inspect surrounding components for damage at this stage.
5. Installing the New Control Arm The new lower control arm should be positioned and secured using the previously removed hardware. Ensure all components are properly aligned.
6. Reconnecting Components Finally, reconnect any components that were detached during the process, making sure to torque all bolts to the manufacturer’s specifications.
7. Reinstalling the Wheel and Testing After everything is securely in place, reinstall the wheel, lower the vehicle, and perform a test drive to ensure that handling and comfort have improved.
Conclusion
Changing the lower control arm is an essential maintenance task that can have a significant impact on vehicle performance and safety. Regular inspections and being attentive to symptoms of wear can help car owners avoid costly repairs and enjoy a smoother driving experience. While some may opt to tackle this task themselves, consulting a professional mechanic is always a wise decision, ensuring the job is done correctly and safely. Ultimately, maintaining the lower control arm and the overall suspension system is crucial for a vehicle’s longevity and performance on the road.
-

 English
 Afrikaans
 Albanian
 Amharic
 Arabic
 Armenian
 Azerbaijani
 Basque
 Belarusian
 Bengali
 Bosnian
 Bulgarian
 Catalan
 Cebuano
 Corsican
 Croatian
 Czech
Czech
 Danish
 Dutch
Dutch
 Esperanto
 Estonian
 Finnish
 French
 Frisian
 Galician
 Georgian
 German
 Greek
Greek
 Gujarati
 Haitian Creole
 Hausa
Hausa
 Hawaiian
 Hebrew
 Hindi
Hindi
 Miao
Miao
 Hungarian
 Icelandic
 Igbo
Igbo
 Indonesian
 Irish
Irish
 Italian
 Japanese
 Javanese
 Kannada
 Kazakh
 Khmer
Khmer
 Rwandese
 Korean
 Kurdish
 Kyrgyz
 Lao
Lao
 Latin
Latin
 Latvian
 Lithuanian
 Luxembourgish
 Macedonian
 Malgashi
 Malay
Malay
 Malayalam
 Maltese
 Maori
Maori
 Marathi
 Mongolian
 Myanmar
 Nepali
 Norwegian
 Norwegian
 Pashto
 Persian
 Polish
 Portuguese
 Punjabi
 Romanian
 Russian
 Samoan
 Scottish Gaelic
 Serbian
 Sesotho
 Shona
Shona
 Sindhi
 Sinhala
 Slovak
 Slovenian
 Somali
 Spanish
 Sundanese
 Swahili
 Swedish
 Tagalog
 Tajik
Tajik
 Tamil
Tamil
 Tatar
Tatar
 Telugu
 Thai
Thai
 Turkish
 Turkmen
 Ukrainian
 Urdu
Urdu
 Uighur
 Uzbek
Uzbek
 Vietnamese
 Welsh
Welsh
 Bantu
Bantu
 Yiddish
 Yoruba
 Zulu
Zulu
 Occitan


