-
 Afrikaans
 -
 Albanian
 -
 Amharic
 -
 Arabic
 -
 Armenian
 -
 Azerbaijani
 -
 Basque
 -
 Belarusian
 -
 Bengali
 -
 Bosnian
 -
 Bulgarian
 -
 Catalan
 -
 Cebuano
 -
 Corsican
 -
 Croatian
 -
 Czech
Czech -
 Danish
 -
 Dutch
Dutch -
 English
 -
 Esperanto
 -
 Estonian
 -
 Finnish
 -
 French
 -
 Frisian
 -
 Galician
 -
 Georgian
 -
 German
 -
 Greek
Greek -
 Gujarati
 -
 Haitian Creole
 -
 hausa
hausa -
 hawaiian
 -
 Hebrew
 -
 Hindi
Hindi -
 Miao
Miao -
 Hungarian
 -
 Icelandic
 -
 igbo
igbo -
 Indonesian
 -
 irish
irish -
 Italian
 -
 Japanese
 -
 Javanese
 -
 Kannada
 -
 kazakh
 -
 Khmer
Khmer -
 Rwandese
 -
 Korean
 -
 Kurdish
 -
 Kyrgyz
 -
 Lao
Lao -
 Latin
Latin -
 Latvian
 -
 Lithuanian
 -
 Luxembourgish
 -
 Macedonian
 -
 Malgashi
 -
 Malay
Malay -
 Malayalam
 -
 Maltese
 -
 Maori
Maori -
 Marathi
 -
 Mongolian
 -
 Myanmar
 -
 Nepali
 -
 Norwegian
 -
 Norwegian
 -
 Occitan
 -
 Pashto
 -
 Persian
 -
 Polish
 -
 Portuguese
 -
 Punjabi
 -
 Romanian
 -
 Russian
 -
 Samoan
 -
 Scottish Gaelic
 -
 Serbian
 -
 Sesotho
 -
 Shona
Shona -
 Sindhi
 -
 Sinhala
 -
 Slovak
 -
 Slovenian
 -
 Somali
 -
 Spanish
 -
 Sundanese
 -
 Swahili
 -
 Swedish
 -
 Tagalog
 -
 Tajik
Tajik -
 Tamil
Tamil -
 Tatar
Tatar -
 Telugu
 -
 Thai
Thai -
 Turkish
 -
 Turkmen
 -
 Ukrainian
 -
 Urdu
Urdu -
 Uighur
 -
 Uzbek
Uzbek -
 Vietnamese
 -
 Welsh
Welsh -
 Bantu
Bantu -
 Yiddish
 -
 Yoruba
 -
 Zulu
Zulu
changing upper control arm
Changing the Upper Control Arm A Comprehensive Guide
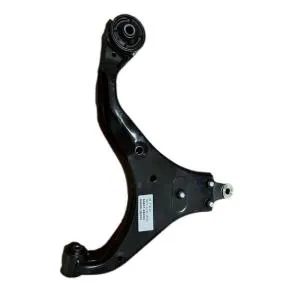
The upper control arm is a fundamental component of a vehicle's suspension system, playing a vital role in maintaining wheel alignment and ensuring a smooth ride. Over time, wear and tear can compromise its performance, leading to handling issues and uneven tire wear. If you notice any signs of damage or deterioration, replacing the upper control arm is essential for the safety and performance of your vehicle. This article offers a step-by-step guide on how to change the upper control arm, ensuring a successful and efficient replacement.
Tools and Materials Needed Before you begin the replacement process, gather the necessary tools and materials. You'll typically need a socket set, wrenches, a torque wrench, a ball joint separator, and possibly a pry bar. Additionally, it's advisable to have new bushings or bolts on hand, as they often require replacement during the process.
Changing the Upper Control Arm A Comprehensive Guide
Step 2 Remove the Wheel Once the vehicle is properly secured, remove the lug nuts and take off the wheel. This access allows you to examine the suspension components closely.
changing upper control arm

Step 3 Disconnect the Ball Joint Locate the upper control arm and its connected ball joint. Using the appropriate tools, loosen and remove the nut securing the ball joint to the steering knuckle. A ball joint separator can make this task easier, ensuring that you don’t damage surrounding components.
Step 4 Detach the Upper Control Arm Next, locate the bolts securing the upper control arm to the frame of the vehicle. Remove these bolts with a socket wrench. Keep track of the hardware, as you will need it for the installation of the new control arm.
Step 5 Install the New Control Arm Position the new upper control arm in place, aligning it with the mounting points. Insert the bolts and tighten them to the manufacturer's recommended specifications using a torque wrench. Reattach the ball joint to the steering knuckle, securing it with the nut.
Step 6 Reassemble and Test Once everything is tightened and secured, reattach the wheel and lower the vehicle back to the ground. Test the suspension by gently bouncing the front end. Ensure there are no unusual sounds or movements.
Conclusion Changing the upper control arm may seem daunting, but with the right tools and a systematic approach, it can be accomplished effectively. Regular maintenance of your vehicle's suspension components will not only enhance performance but also prolong the life of your tires. If you’re unsure about any part of the process or encounter unexpected issues, don’t hesitate to consult a professional mechanic.
-

 Afrikaans
 Albanian
 Amharic
 Arabic
 Armenian
 Azerbaijani
 Basque
 Belarusian
 Bengali
 Bosnian
 Bulgarian
 Catalan
 Cebuano
 Corsican
 Croatian
 Czech
Czech
 Danish
 Dutch
Dutch
 Esperanto
 Estonian
 Finnish
 French
 Frisian
 Galician
 Georgian
 German
 Greek
Greek
 Gujarati
 Haitian Creole
 Hausa
Hausa
 Hawaiian
 Hebrew
 Hindi
Hindi
 Miao
Miao
 Hungarian
 Icelandic
 Igbo
Igbo
 Indonesian
 Irish
Irish
 Italian
 Japanese
 Javanese
 Kannada
 Kazakh
 Khmer
Khmer
 Rwandese
 Korean
 Kurdish
 Kyrgyz
 Lao
Lao
 Latin
Latin
 Latvian
 Lithuanian
 Luxembourgish
 Macedonian
 Malgashi
 Malay
Malay
 Malayalam
 Maltese
 Maori
Maori
 Marathi
 Mongolian
 Myanmar
 Nepali
 Norwegian
 Norwegian
 Occitan
 Pashto
 Persian
 Polish
 Portuguese
 Punjabi
 Romanian
 Russian
 Samoan
 Scottish Gaelic
 Serbian
 Sesotho
 Shona
Shona
 Sindhi
 Sinhala
 Slovak
 Slovenian
 Somali
 Spanish
 Sundanese
 Swahili
 Swedish
 Tagalog
 Tajik
Tajik
 Tamil
Tamil
 Tatar
Tatar
 Telugu
 Thai
Thai
 Turkish
 Turkmen
 Ukrainian
 Urdu
Urdu
 Uighur
 Uzbek
Uzbek
 Vietnamese
 Welsh
Welsh
 Bantu
Bantu
 Yiddish
 Yoruba
 Zulu
Zulu
 English


